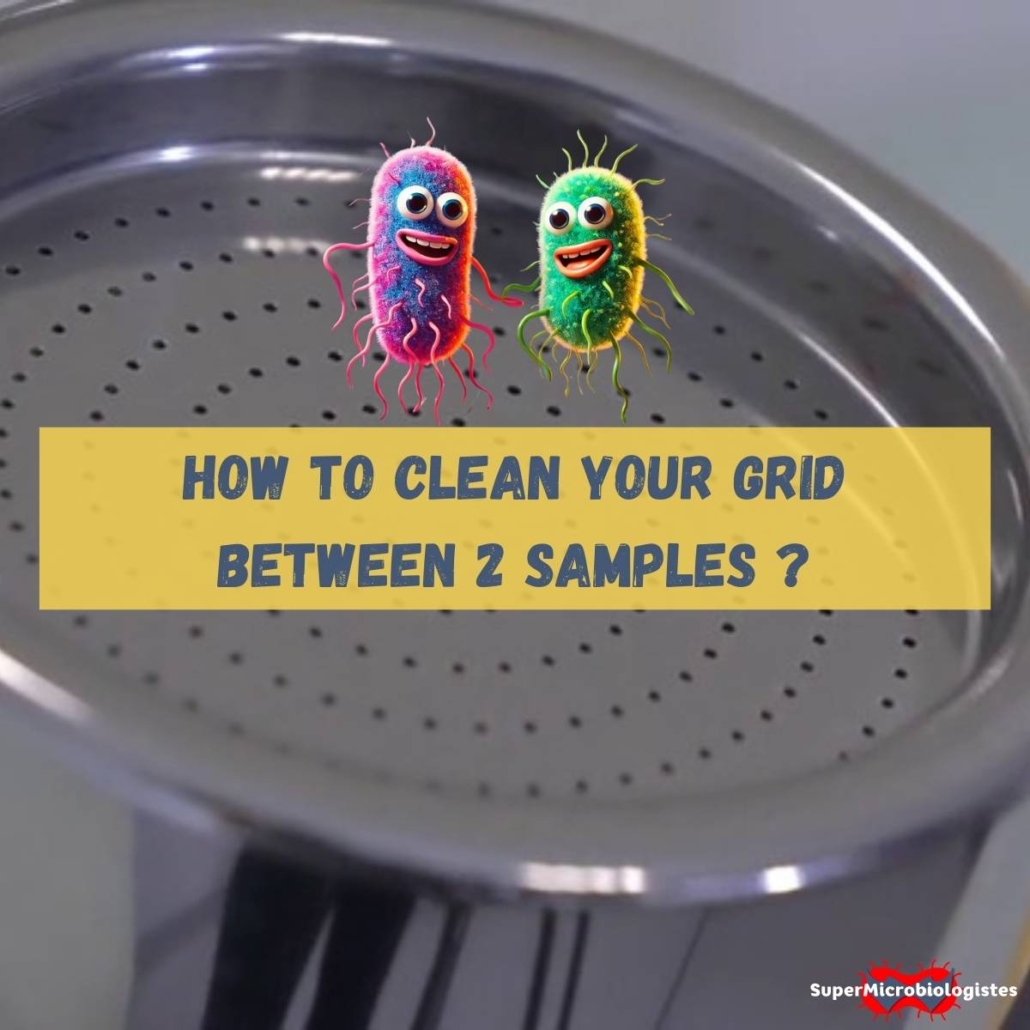
Microbiology: How to Decontaminate an Air Sampler lid Between Samples?
When you go on an air sampling campaign, it’s never for just one sample.
You get your control plan ready (whether on paper or digitally), pick up your air sampler and agar plates, and head off for a few hours in the production area.
But between two samples, to avoid cross-contamination, how do you ensure the microbiological cleanliness of your microbial air sampler grid?
That’s exactly the question we asked the SuperMicrobiologists. And as you’ll discover in this article, solutions exist, and they’re varied… just the way we like them!
Discover the 2 BEST Air Sampler
We polled the SuperMicrobiologists.
Here are their favorite Air Sampler
Use Single-Use Sieve
Some viable air sampler suppliers offer sterile, individually packaged, ready-to-use sieves.
Once you arrive at the sampling site, you open the package, plug the sieves on your viable air sampler, take your sample, and then dispose of the sieve.
Of course, this solution has a cost, not only financially but also environmentally. However, it can be very useful in sensitive (sterile) areas or in case of autoclave failure (yes, it happens!).
This method is mainly used in pharmaceutical laboratories.
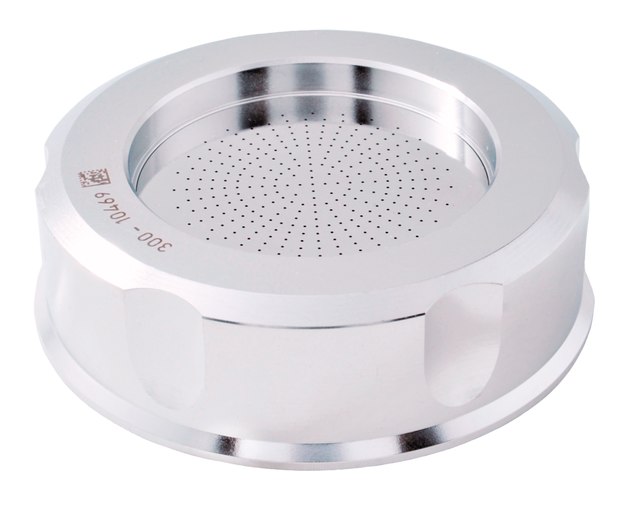
Sterilize Air Sampler Grids Between Each Sample
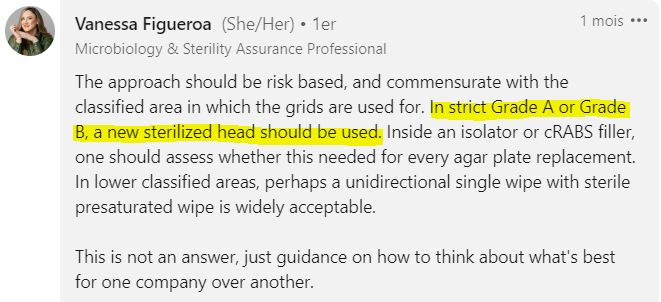
In some critical pharmaceutical areas (Grade A and B cleanrooms), simply “cleaning” the grids between samples is out of the question.
It’s essential to use sterile grid, previously autoclaved by the lab. Each grid is used for one sample.
For samples in isolators or RABS (Restricted Access Barrier System), the question of sieve replacement between each sample may arise.
Indeed, in these sterile areas, cross-contamination is indeed extremely rare, and if it did occur, it would still provide important information: “There is contamination where there shouldn’t be any!”


How to Sterilize the Air Impactor Grids?
Autoclave sterilization doesn’t exclude the need for prior “cleaning” of the grid.
Here are the recommended steps from a SuperMicrobiologist:
- Manual cleaning with PPE (water for injection)
- Drying
- Manual IPA disinfection (isopropyl alcohol)
- Bagging and then autoclaving
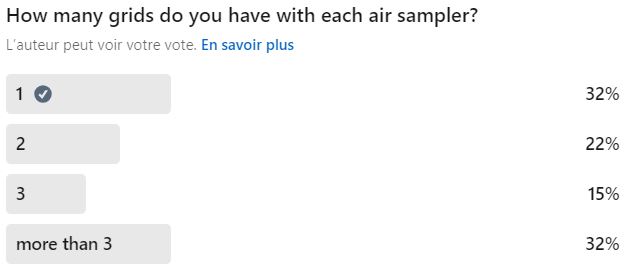
Can You Use Multiple lids per Biocollector?
Yes, it’s entirely possible to have several lids per biocollector, and it’s even the preferred solution for many laboratories, as revealed by our survey:
So, you head out for sampling with several autoclaved lids and use a different one for each sample.
Be cautious if you choose this method:
- Your biocollector must be calibrated with all the lids assigned to it (which can increase calibration costs).
- Precise traceability of the lids may be required: you must be able to identify which sieves was used for which sample. The lids must therefore be numbered and easily recognizable.
Use Disinfectant Wipes Between Samples
The ideal way to avoid cross-contamination would be to use a sterile lid for each sample… but between the ideal and reality, there’s sometimes a gap.
Many SuperMicrobiologists from various sectors (pharmaceutical, hygiene, food industry, cosmetics) have told us they use impregnated wipes to disinfect their lids between each sample.
What Type of Wipe Should Be Used?
Practices are fairly uniform. Generally, you start the sampling campaign with a sterile grid, and then use a wipe to disinfect the grid between each sample.
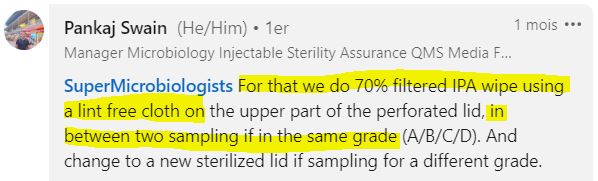

Commonly used options include:
- Alcohol-soaked wipes
- Ready-to-use wipes with disinfectant (bactericide and fungicide, watch out for contact time!)
Watch Out for Wipe Residues
When using disinfectant wipes, it’s crucial to be mindful of the residues they might leave behind.
There are two types of residues:
Physical residues (fibers)
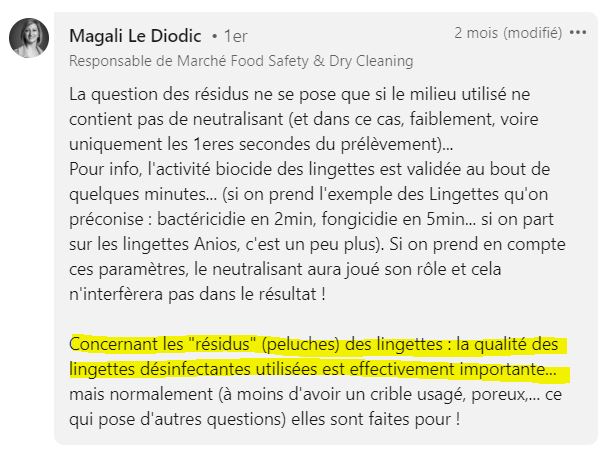
“Regarding the “residues” (lint) from the wipes: the quality of the disinfectant wipes used is indeed important.“
When cleaning an air impactor lid with a wipe, fibers may lodge in the grid holes, potentially distorting the next sample. It’s essential to choose wipes that don’t release fibers.
Another point to watch: Some lid holes may be poorly “filed,” with small burrs that damage the wipe and collect fibers (and could even pierce gloves or injure microbiologists!). If this happens, it’s recommended to contact your air sampler supplier, as it means the lid doesn’t meet standards.
Chemical residues
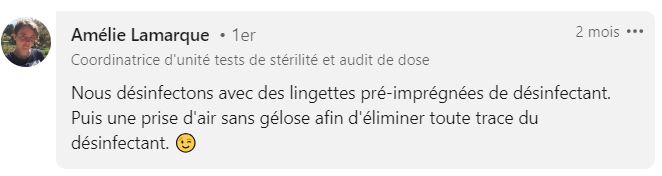
“We disinfect with pre-soaked disinfectant wipes. Then we take an air sample without agar to remove any trace of the disinfectant. 😉“
If chemical residues remain on your sieves, they might end up on your agar plate and affect microbial growth, potentially leading to an underestimation of your microbial population.
When using alcohol-soaked wipes, it’s crucial to allow the alcohol to fully evaporate before moving on to the next sample. Some people speed up the drying process by running a brief vacuum cycle on the air sampler without the Petri dish, but beware of the potential risk of… recontamination!
If you’re using disinfectant-soaked wipes, you’ll need to evaluate the impact of the residues on your samples, which can be complex. First, check if your culture media contains neutralizers, and if they are effective against the disinfectant used.
Other Wipe Tips
Here are a few other tips we gathered on wipe usage:
- You can open a new sterile grid for each area (or room). In between samples in the same room, you disinfect the grid with a wipe.
- If possible, start with the least contaminated area and work your way to the “dirtiest” area.
- When using the wipe, be sure to clean not only the outer surface of the lid but also the inside. And while you’re at it, a quick wipe of the air sampler won’t hurt!
Conclusion
You now have a wide range of solutions for performing multiple consecutive samples with a air sampler.
Unfortunately, there’s no universal solution.
By relying on your knowledge of your environment, the number of samples to be taken, and their criticality, you can assess the risks and choose the most appropriate method.
It’s even highly likely that you’ll opt for a combination of several approaches.
Let us know in the comments what your strategy is!
A big thank you to all the SuperMicrobiologists who took the time to share their experiences with us!


Best idea may be to procure multiple life for the same air sampler get them autoclaved and secure them in sterile bag and use it each time …but there should calibration in place we can always have supporting documents on exact measurements of each lids with precision and accuracy acceptance .. then it may be good idea how ever wiping may also be the better option if there is a cost glitch…this is my view point