How to choose the best air sampler?
The air sampler is certainly not the most expensive piece of equipment in the laboratory, but choosing the right model is a serious commitment that will stay with you for many years.
To make the right choice, several criteria need to be considered, such as the technical performance of the device, ease of use, as well as calibration and maintenance.
In this article, we will review all the key factors to evaluate before purchasing a new viable air sampler.
Content :
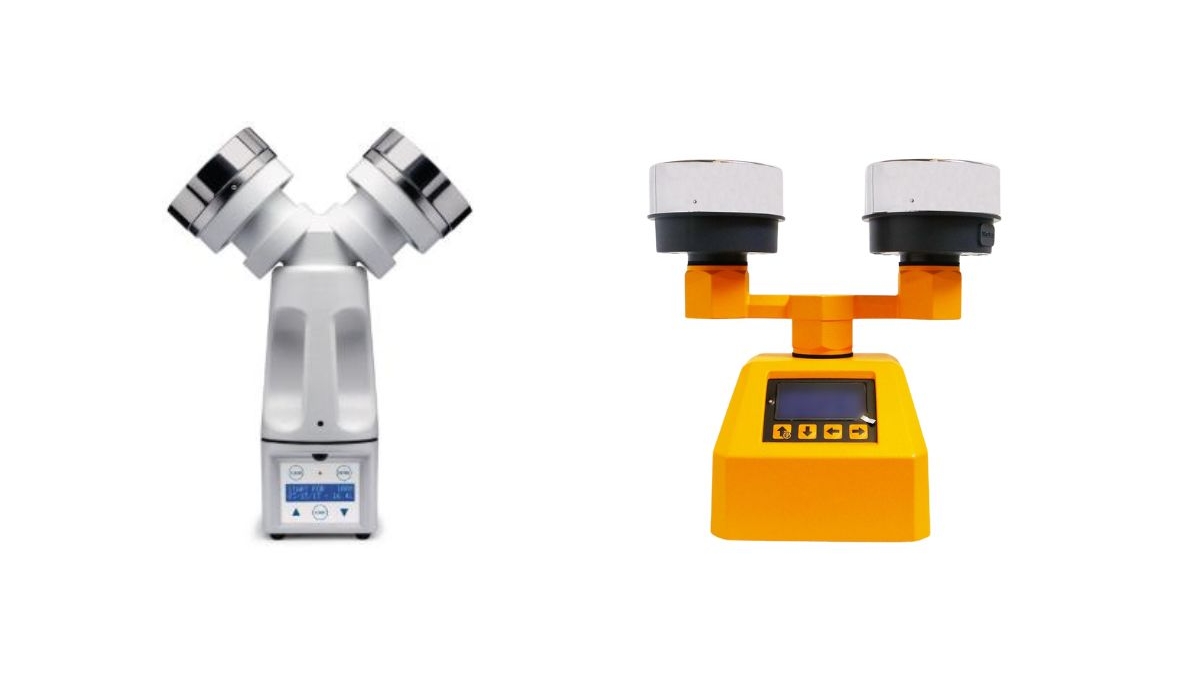
Discover the 2 BEST Air Sampler
We polled the SuperMicrobiologists.
Here are their favorite Air Sampler
What is an air sampler?
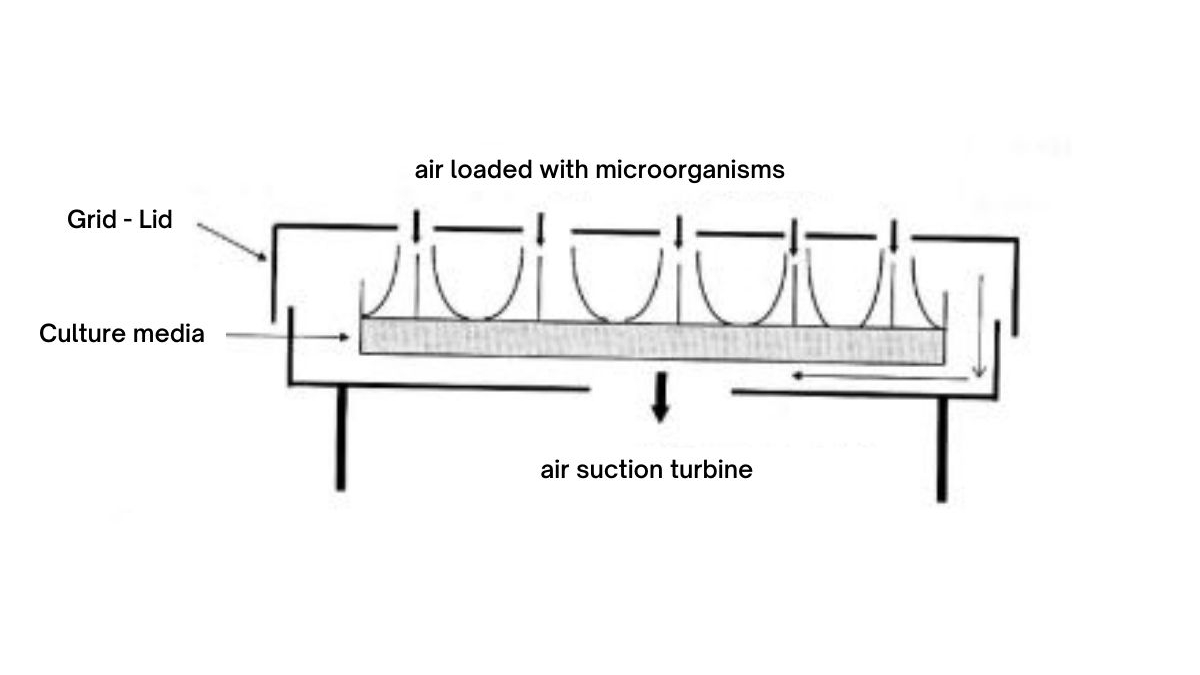
An air sampler, also known as a bio-impactor, is a device used to collect a large volume of air in a short period of time (e.g., 1000 liters in 10 minutes).
The collected air is directly impacted onto the surface of a culture medium (in a Petri dish), allowing for the quantification and identification of microorganisms present in the air.

Operating principle of an air sampler
This method, described in the NF EN 17141 standard (which replaces ISO 14698), is referred to as “active.” It provides a representation of the contamination present in the environment. It complements the so-called passive method (by sedimentation).

Technical-related criteria for the air sampler
Compatibility with your Petri dishes
What size of Petri dish do you plan to use in the air sampler, 55 mm or 90 mm? Manufacturers often offer compatibility with both sizes, but you need to decide at the time of purchase.
You should also check the compatibility of your own Petri dishes. Almost all dishes vary in height and fill level.
Real-life examples: agar touching the perforated grid, or dishes that don’t fit securely inside the air sampler).
Our Advice: Perform a physical check to ensure your Petri dishes are compatible.
Air sampler flow rate
Most air samplers are sold with a fixed flow rate of 100 liters per minute (the NF EN 17141 standard refers to a flow rate of “typically 100 l/min” without further restrictions).
However, in recent years, some manufacturers have started offering higher flow rates (120 to 200 liters per minute) and even lower flow rate with the new Annexe 1.
With 200 l/min, the advantage is clear: you can cut your sampling time in half. On the other hand, there is a risk of reduced recovery rates.
For example, microorganisms may be damaged upon impact on a too-dry agar, or mold may be embedded too deeply in overly soft agar, limiting oxygen availability.
It’s up to you to ensure that the increased flow rate does not affect sample recovery.
Sampling volumes
Ensure that the device is capable of collecting the appropriate volumes of air needed for your testing requirements.
Our Advice: Make a list of all the volumes you need to sample
The number of sampling heads

If you are sampling on two different media (e.g., TSA and SDA), it can be helpful to have an air sampler with two sampling heads, allowing you to cut sampling time in half.
There are even air samplers with three heads to perform sequential sampling.
Battery capacity
There’s nothing more frustrating than not being able to complete your sampling round because the battery is dead.
Ask about the number of cycles the battery can handle (e.g., 25 samples of 1000 liters), the charging time, and the battery’s lifespan (number of charging cycles).
ATEX or not?
If you’re conducting sampling in “explosive” environments, your air sampler must have ATEX certification (ATmosphere EXplosives).
Most manufacturers offer this option, but don’t forget to request it (the device will be more expensive).
Material of the bio-impactor heads (the grid)
The air sampler grids, also known as lids, are typically made of stainless steel, making them easy to autoclave. However, be sure to check the quality of the hole perforations. In some cases, grids have been found with clogged or poorly drilled holes, which can affect sampling quality.
Some suppliers offer single-use air sampler grids (convenient in certain cases, but not very eco-friendly!), plastic grids that can be autoclaved up to 10 times (what’s the point?) or aluminium lids.
You can also order multiple grids for the same device. In this case, pay attention to traceability, as the impactor grids must always be used with the same device (the air sampler is calibrated with ALL its grids).
Calibration-related criteria for the air sampler
Air sampler flow rate checker
Each air sampler has a fixed flow rate, often 100 l/min. Occasionally, there may be issues with the device that cause this flow rate to change:
- If the flow rate increases, more air than intended will be sampled, leading to an overestimation of contamination.
- If the flow rate decreases, contamination will be underestimated. In such cases (this has happened before), all results since the last calibration must be reviewed and recalculated.
To avoid having to reanalyze up to 12 months of data, more and more suppliers now offer optional “flow rate checkers.”
These devices allow for regular checks to ensure the flow rate remains accurate, providing peace of mind. However, note that the flow rate checker does not replace the need for full calibration.
Air sampler calibration
Air sampler calibration is typically carried out once or twice a year using a calibration bench. This can be performed by the manufacturer or by a service provider with a calibration bench compatible with your air sampler.
Calibration verifies all the device’s constants (flow rate, timer, etc.). When purchasing, it’s important to ask about the calibration conditions:
- Who performs the calibration: Is it the distributor, the manufacturer, or an external provider? Where are they located? You can also request the calibration protocol and a sample certificate to ensure that all the information required by your Quality Assurance (QA) team is included.
- Logistics: This is often a challenge. It’s usually during the busiest times in the lab that you realize the device needs calibration. Do you need to send the device back? If so, does it come with a sturdy transport case (We’d rather not mention how many air samplers we’ve seen damaged during delivery)? How long will it take to get your device back?
Some suppliers offer on-site calibration for a minimum number of devices, which can save time.
- Multiple grids: If your air sampler has multiple grids, they must be calibrated together. Each device should be calibrated with all its associated grids!
- Cost: Keep in mind that calibration and maintenance are often two separate contracts, so clarify this with the provider.
- Calibration reminders: Who handles the reminders? Is it managed by lab software (or a person), QA, the device itself, or the supplier?
Usage-related criteria for the air sampler
Cleaning the air sampler
Air samplers today come in various shapes and materials. It’s important to check the ease of cleaning the device’s casing and ensure it is resistant to dust and water (IP rating).
Example IP65: Protection Index against dust (first digit from 0 to 6) and liquids (second digit from 0 to 9). The higher the number, the greater the protection the device offers.
Our Advice : Always verify the IP rating to ensure the sampler is suited to your lab conditions and can withstand regular cleaning protocols.
Ease of use of the air sampler
Test the air sampler in real-life conditions, ideally with multiple users over several days.
- Is the air sampler grid easy to open?
- Is the Petri dish easy to insert and retrieve?
- Are the programming and operation intuitive?
Air samplers often have very few buttons, which can either be convenient or a real challenge!
Stability of the air sampler during sampling
There is often movement around the equipment (especially in production environments), so it’s important to have devices that are as stable as possible to prevent them from shifting during sampling.
In case of a fall, at best you’ll need to redo the sampling, and at worst, you may have to replace the air sampler.
Starting the sampling process
You can start sampling by pressing the button directly on the air sampler, but often there’s a need to leave the room before starting the analysis.
For this, either a Bluetooth remote or a timer delay is used. Be sure to check that these options are available AND that they are easy to use.
Traceability of sampling and connectivity
This is often where things get tricky… Before proceeding, it’s crucial to clearly identify your needs (ideally, write them down in the form of a short specifications document).
- What level of traceability do you need for your samples?
- Do you need to track the operator, the room, the sampling point, the date, the Petri dish, etc.?
- Do you want the air sampler to handle this, or do you have a LIMS or another environmental control management software in place?
Clearly describe your sampling “sequence.”
All these questions are worth asking because the answers can either simplify your life or make it much more complicated!
If you want the air sampler to handle traceability, make sure to check how easy it is to use and extract the data.
Weight of the air sampler
Operators carry the air sampler throughout the day, so to minimize the risk of musculoskeletal disorders (MSDs), the weight and ergonomics of the device should be taken into consideration.
Our Advice : The best approach is to have the device tested in real-life situations by multiple operators over a significant period of time.
Air sampler accessories
There are numerous accessories available, such as tripods, poles, barcode readers, printers, carrying cases, induction chargers, carts, gas adapters, flow rate checkers, and more.
Our Advice : Make a list of all the accessories you need and check that your supplier can provide them.
Trust in your supplier!
One final point, which applies to all technologies, is… the trust you have in your supplier!
This may seem subjective, but it’s important and can be based on tangible criteria, such as:
- Is it easy to reach them by phone? Do you get through directly to a person or an automated system?
- Have you worked with them before? If not, ask around in another lab (on LinkedIn or via SuperMicrobiologistes).
- Are they responsive? Do they quickly provide a solution when a problem arises?
Now you have all the tools to choose the perfect air sampler for your lab—it’s up to you!


Leave a Reply
Want to join the discussion?Feel free to contribute!